 844 408 3056
 Hot Deal
# Pool Table Room Layout Guide: Sizes, Spacing, and Design Ideas
Buying a pool table is exciting—until you realize it won’t fit in your game room. Or worse, it *technically* fits, but you can’t actually play comfortably. The difference between a cramped, frustrating space and a perfect billiard room comes down to planning room layout properly.
This comprehensive guide covers everything: room size requirements, layout optimization, design ideas, lighting, flooring, and how to make the most of whatever space you have.
The Golden Rule: Cue Length + Table Size = Minimum Room Size
Here’s the math that determines whether a table fits:
Formula:
Table length + (2 × cue length) = minimum room length
Table width + (2 × cue length) = minimum room width
Standard cue length: 58 inches (4.83 feet)
This ensures you can shoot comfortably from any position around the table without hitting walls.
Minimum Room Sizes by Table Size
7-Foot Table (Bar Size)
Table dimensions: 7′ × 3.5′ (39″ × 78″)
Minimum room size with 58″ cues: 16’8″ × 13’4″
Comfortable room size: 17′ × 14′
Minimum room size with 48″ shorty cues: 15′ × 12′
Best for:
– Smaller spaces, basements, apartments
– Casual family play
– Learning the game
– Kids and beginners
8-Foot Table (Standard Home Size)
Table dimensions: 8′ × 4′ (44″ × 88″)
Minimum room size with 58″ cues: 17’4″ × 13’8″
Comfortable room size: 18′ × 14′
Minimum room size with 52″ cues: 16’8″ × 13’4″
Best for:
– Most home game rooms
– Serious recreational players
– Standard league play (some leagues)
– Good balance of playability and space
9-Foot Table (Tournament Size)
Table dimensions: 9′ × 4.5′ (50″ × 100″)
Minimum room size with 58″ cues: 18′ × 14’4″
Comfortable room size: 19′ × 15′
Minimum room size with 52″ cues: 17’4″ × 13’10”
Best for:
– Dedicated billiard rooms
– Serious players and competitors
– Professional practice
– Tournament-style play
Dealing with Tight Spaces: Solutions and Compromises
What if your room is close but not quite big enough? You have options.
Option 1: Shorter Cues
Keep a set of shorter cues specifically for tight-spot shots.
Shorter cue options:
– 52-inch cues: Save 6 inches per side (1 foot total per dimension)
– 48-inch cues: Save 10 inches per side (1.67 feet total)
– 42-inch cues: Save 16 inches per side (2.67 feet)
Reality check: Shorter cues feel different and affect your game. Fine for occasional tight shots, but if you need them constantly, the room is too small.
Option 2: Size Down the Table
Sometimes a 7-foot table in a comfortable room beats a 9-foot table you can barely shoot on.
When to size down:
– Room is 1-2 feet short in any dimension
– Primary users are casual or family players
– Budget is tight (smaller tables cost less)
– Space serves multiple purposes
Option 3: Wall-Mounted Cue Racks
Wall racks keep cues off the floor, giving you slightly more movement room during play.
Option 4: Removable Wall Sections
For dedicated billiard rooms, some homeowners install removable wall panels or wainscoting that can be temporarily opened for difficult shots. Creative but only for serious setups.
Option 5: Accept the Limitation
Sometimes you’ll need to shoot carefully or use a bridge stick in corners. If it’s rare, it might be worth the trade-off for having a table at all.
Room Layout Best Practices
Centering the Table
Ideal: Center the table in the room both lengthwise and widthwise
Benefits:
– Equal cue clearance on all sides
– Balanced aesthetic
– Easier to walk around
– Better for spectators
When to offset:
– One wall has built-ins or fixtures
– You need to preserve walkway traffic
– Room is irregular shape
Door and Entrance Placement
Consider how people enter the room:
Ideal: Entry door on the short wall, away from the table ends
Avoid: Doors that open into the cue clearance zone
Compromise: Pocket doors or barn-style doors that don’t swing into play area
Traffic Flow
If your game room also serves as a hallway or has multiple exits:
- Position table so main traffic path doesn’t cross playing area
- Leave wider clearance on traffic sides
- Consider low barriers or railings to define play space
Lighting: The Most Important Detail
Poor lighting ruins even the most perfectly sized room. Great lighting makes every shot easier.
Pool Table Lighting Requirements
Ideal setup:
– Dedicated overhead light fixture centered over table
– Light positioned 32-42 inches above playing surface
– Fixture length approximately ⅔ to ¾ the table length
– 75-100 watts per foot of table length (LED equivalent)
– Warm white or neutral white color temperature (2700K-4000K)
Common fixture styles:
– Traditional: Three-shade or four-shade with metal or glass shades
– Modern: Linear LED fixtures
– Classic: Tiffany-style stained glass
– Industrial: Exposed bulb or warehouse-style
Fixture Sizing
7-foot table: 50-60 inch fixture
8-foot table: 60-70 inch fixture
9-foot table: 68-80 inch fixture
Critical: The fixture should illuminate the entire playing surface evenly without creating shadows.
Avoiding Common Lighting Mistakes
❌ Relying only on recessed ceiling lights (creates shadows)
❌ Positioning fixture too high (weak, uneven light)
❌ Using fixture that’s too small (dark corners)
❌ Cool white or daylight bulbs (harsh, uncomfortable)
❌ No dimmer switch (can’t adjust for ambient vs game lighting)
Pro tip: Install a dimmer switch so you can adjust lighting based on play vs socializing.
Flooring Considerations
Best Flooring for Pool Rooms
Concrete (sealed or finished):
✅ Extremely stable
✅ Supports heavy table weight
✅ Easy to clean
❌ Hard, cold feel
❌ Can be loud
Hardwood or Engineered Wood:
✅ Classic, attractive look
✅ Stable when properly installed
✅ Comfortable underfoot
❌ Can expand/contract with humidity
❌ May scratch or dent from dropped balls
Tile or Luxury Vinyl:
✅ Durable and stable
✅ Easy to clean
✅ Moisture resistant
❌ Can be cold
❌ Grout lines can be issue with dropped equipment
Carpet:
❌ Not recommended (unstable for table leveling, holds chalk dust, hard to clean)
Best choice: Hardwood, engineered wood, or luxury vinyl plank in a dedicated billiard room. Concrete with area rugs for basement setups.
Area Rugs and Mats
Even with hard flooring, consider area rugs:
Benefits:
– Defines playing area
– Reduces noise
– More comfortable for long sessions
– Protects floor from dropped balls
Rug sizing:
– Should extend at least 2-3 feet beyond table on all sides
– For 8-foot table: 12′ × 16′ rug minimum
– Low pile (easier to walk on, looks cleaner)
Design Ideas and Styles
Classic Billiard Room
Elements:
– Dark wood paneling or wainscoting
– Green felt table
– Traditional multi-shade light fixture
– Leather seating
– Wall-mounted cue rack
– Vintage pool posters or signs
Color palette: Deep greens, burgundy, rich browns, brass accents
Modern Game Room
Elements:
– Clean lines and minimal decor
– Contemporary light fixture (linear LED or geometric)
– Bold felt color (grey, blue, red)
– Modern art or photography
– Built-in seating
– Hidden storage
Color palette: Greys, blacks, whites, with accent colors
Industrial/Warehouse Style
Elements:
– Exposed brick or concrete walls
– Metal fixtures and furniture
– Edison bulbs or industrial lighting
– Reclaimed wood accents
– Open ceiling (exposed ductwork)
– Bar-height seating
Color palette: Blacks, greys, raw woods, metal finishes
Sports Bar Theme
Elements:
– Multiple TVs mounted on walls
– Bar or counter with stools
– Sports memorabilia
– Dartboard or other games
– Neon signs
– Commercial-grade furniture
Color palette: Team colors, bold accents, dark backgrounds
Family-Friendly Multi-Use
Elements:
– Bright, welcoming colors
– Convertible furniture
– Storage for multiple games
– Comfortable seating for non-players
– Good natural light
– Durable, easy-clean surfaces
Color palette: Lighter woods, soft neutrals, cheerful accents
Essential Game Room Features
Beyond the table itself, these additions make your billiard room functional and enjoyable:
1. Cue Storage
Options:
– Wall-mounted racks (6-12 cues)
– Freestanding floor racks
– Corner racks (space-saving)
– Built-in storage cabinets
Placement: Along wall with good clearance, not in playing area
2. Accessory Storage
Store balls, chalk, racks, brushes, and other gear:
– Shelving units
– Built-in cabinets
– Storage benches
– Drawer units
3. Seating
Comfortable seating for players waiting turns and spectators:
– Bar stools or counter-height chairs
– Bench seating along walls
– Pub table and chairs in corner
– Comfortable armchairs
Placement: Against walls, out of cue swing zones
4. Scorekeeping
- Whiteboard or chalkboard
- Electronic scoreboard
- Overhead projector for tournaments
- Simple notepad and pencil
5. Refreshment Area
If space allows:
– Small fridge for drinks
– Bar cart or mini-bar
– Microwave for snacks
– Coffee station
Critical: Keep all food and drink AWAY from the table. Spills ruin felt.
Climate Control
Pool tables are sensitive to temperature and humidity.
Ideal conditions:
– Temperature: 65-75°F (consistent)
– Humidity: 40-60%
– Avoid: Direct sunlight on table (fades felt)
– Avoid: Near HVAC vents (uneven temperature)
Solutions:
– Dehumidifier in damp basements
– Climate control in finished spaces
– Window treatments to block direct sun
– Table cover when not in use
POOL TABLE ACCESSORIES
-

-
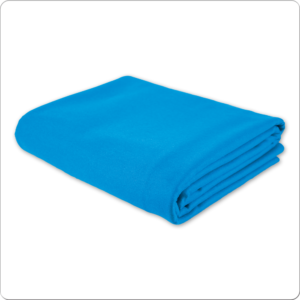
9 FOOT HEAVY DUTY POOL TABLE COVER
$82.95 Select options This product has multiple variants. The options may be chosen on the product page -

-
8 FOOT HEAVY DUTY POOL TABLE COVER
$76.95 Select options This product has multiple variants. The options may be chosen on the product page
Basement Billiard Rooms
Basements are popular for pool tables but come with challenges:
Advantages:
✅ Usually have necessary space
✅ Separate from main living areas (noise isolation)
✅ Can be dedicated to entertainment
✅ Often have concrete floors (very stable)
Challenges and Solutions:
Low ceilings:
– Ensure minimum 7’6″ ceiling height (8’+ preferred)
– Mount light fixture close to ceiling
– Choose low-profile fixtures
Humidity:
– Run dehumidifier to keep humidity 40-60%
– Seal concrete floors
– Ensure proper ventilation
Access:
– Measure stairway and doorways BEFORE buying table
– Many tables won’t fit down standard basement stairs assembled
– Plan for professional delivery through bilco doors or windows
Concrete floors:
– Great for stability
– Add rugs for comfort and warmth
– Seal concrete to reduce dust
Multi-Purpose Rooms
If your game room also serves other functions:
Strategies:
– Position table to preserve primary traffic paths
– Use furniture that serves dual purposes (storage benches, convertible seating)
– Keep table covered when not in use (protects from dust, provides work surface)
– Modular furniture that can be rearranged
– Wall-mounted or fold-down features (desks, tables)
Popular combinations:
– Billiards + home theater
– Billiards + home gym
– Billiards + home office
– Billiards + bar/entertainment area
Measuring Your Space
Before you buy, measure carefully:
Step-by-Step Measuring:
- Measure room dimensions (length and width)
- Note any obstacles: Pillars, built-ins, protruding features
- Measure ceiling height (minimum 7’6″, preferably 8’+)
- Measure doorways and hallways (for delivery access)
- Note window locations (avoid direct sunlight on table)
- Identify electrical outlets (for lighting)
- Map traffic patterns (doors, walkways, stairs)
Create a Scale Drawing:
Use graph paper or online room planner:
– Draw room to scale
– Add table size you’re considering
– Add cue clearance zones (58 inches all around)
– Add furniture and features
– Ensure comfortable circulation
Free online tools:
– RoomSketcher
– SmartDraw
– Floorplanner
– Even simple PowerPoint/Keynote works
Common Room Layout Mistakes
❌ Buying table before measuring room
Result: Table doesn’t fit or has inadequate clearance
❌ Measuring room but forgetting cue clearance
Result: Can’t shoot comfortably from rails
❌ Ignoring obstacles (pillars, built-ins)
Result: Blocked shots or impossible angles
❌ Overlooking delivery access
Result: Can’t get table into room
❌ Positioning table under ceiling fan
Result: Cue hits fan during shots
❌ No dedicated lighting
Result: Shadows and poor visibility
❌ Ignoring traffic flow
Result: People walking through playing area
Quick Reference: Room Size Chart
| Table Size | Playing Surface | Minimum Room (58″ cues) | Comfortable Room |
|————|—————-|————————|——————|
| 7-foot | 39″ × 78″ | 16’8″ × 13’4″ | 17′ × 14′ |
| 8-foot | 44″ × 88″ | 17’4″ × 13’8″ | 18′ × 14′ |
| 9-foot | 50″ × 100″ | 18′ × 14’4″ | 19′ × 15′ |
*With 52″ cues, reduce each dimension by approximately 1 foot*
Making Your Decision
Perfect scenario: You have more than enough space, so focus on table quality and design style.
Tight scenario: Measure obsessively, consider shorter cues or smaller table, prioritize playability over size.
Borderline scenario: Test with full-size cues in the actual space (mark floor with tape). If it feels cramped, size down or reconsider.
Visit Quarter King Billiards
Still not sure what will fit or what you need? Visit our showroom to:
- See multiple table sizes set up properly
- Test cue clearances in real space
- Get expert layout advice for your specific room
- Browse lighting options and accessories
- Plan your complete game room setup
Browse our complete pool table selection online, or contact us for personalized room planning assistance.
Final Thoughts
The perfect billiard room combines adequate space, proper lighting, thoughtful layout, and personal style. Whether you’re converting a basement, finishing a garage, or designing a dedicated billiard room, the key is planning before buying.
Measure twice (or three times), account for all clearances, and don’t compromise on lighting. Do it right, and you’ll have a game room that provides years of enjoyment and countless perfect shots.
PROTECT YOUR TABLE
-

-
7 FOOT HEAVY DUTY POOL TABLE COVER
$72.95 Select options This product has multiple variants. The options may be chosen on the product page -
-
Your ideal game room is waiting—make sure the table fits before you fall in love with it.