 844 408 3056
 Hot Deal
# How to Apply Chalk to a Pool Cue (And Why It Matters More Than You Think)
Chalking your pool cue seems simple—just rub some chalk on the tip, right? Yet improper chalking is one of the most common mistakes that leads to miscues, inconsistent play, and frustration. Learning how to properly apply chalk to your pool cue tip is a fundamental skill that takes only seconds but dramatically affects shot accuracy and success.
This guide explains why chalk matters, the correct chalking technique, and common chalking mistakes that even experienced players make.
Why Chalk Is Essential for Pool
Chalk isn’t optional—it’s a critical component of every shot. Here’s why:
Prevents Miscues
When your cue tip strikes the cue ball without chalk, the smooth leather slides off the smooth cue ball surface, especially on off-center hits. This is a miscue—the most frustrating mistake in pool.
Chalk creates friction between the tip and cue ball, allowing the tip to grip during contact instead of slipping. This grip is what allows you to:
– Apply spin (English)
– Control the cue ball
– Execute draw shots (backspin)
– Strike off-center without slipping
Increases Consistency
Proper chalk coverage ensures every shot feels and reacts the same way. Inconsistent chalking leads to unpredictable cue ball behavior.
Protects Your Tip
Chalk reduces direct leather-on-phenolic contact, minimizing tip wear and extending tip life.
Enables Advanced Techniques
No chalk = no spin. Draw shots, follow, masse, jump shots—all advanced techniques require the enhanced friction that chalk provides.
The Proper Way to Chalk Your Pool Cue
Here’s the correct chalking technique that professionals use:
Step 1: Orient the Chalk
- Hold your cue vertically or at a slight angle
- Hold the chalk cube loosely in your other hand
- The chalk should contact the tip, not the ferrule (the white plastic piece)
Step 2: Apply Chalk in a Twisting/Painting Motion
The correct method (choose one):
Method A: The Twist
– Press the chalk gently against the tip
– Twist the chalk slowly while maintaining light pressure
– Rotate the cue or the chalk (or both) to cover the entire tip
– Continue for 3-5 seconds with 2-3 full rotations
Method B: The Paint Brush
– Gently brush the chalk across the tip in multiple directions
– Cover the entire surface with overlapping strokes
– Paint the tip from multiple angles
– Takes about 3-5 seconds
Both methods work—consistency matters more than which method you choose.
Step 3: Ensure Complete Coverage
The entire tip surface should have a visible layer of chalk:
– No shiny leather spots showing through
– Even coverage from edge to edge
– Don’t forget the tip’s edges (where English/side spin contacts)
Step 4: Avoid Excessive Chalk
You need coverage, not a thick cake:
– A thin, even layer is perfect
– Excess chalk just falls off and makes a mess
– 3-5 seconds of application is sufficient
Step 5: Don’t Grind or Jab
Never:
– Jab the tip straight down into the chalk
– Grind aggressively
– Scrape or drill the chalk into the tip
These actions damage tip shape and create uneven surfaces.
How Often Should You Chalk?
Tournament/Serious Play
Before every shot. Professional players chalk between every single shot without exception.
Why? Because chalk transfers from tip to cue ball on contact, leaving less chalk for the next shot. Chalking before every shot guarantees maximum friction every time.
Recreational Play
Minimum: Before any shot requiring spin or power
– All draw shots (backspin)
– Any shot with English (side spin)
– Power shots
– Jump or masse shots
– Any shot where you’re not hitting dead center
Safe practice: Before every shot
Even if you’re shooting straight in, chalking is a good habit that takes 3 seconds and prevents the one miscue that could cost you the game.
After These Situations (Always)
- After a miscue
- After missing a shot badly
- Before breaking
- After your cue has been sitting for several minutes
- After someone else used your cue
Common Chalking Mistakes
Mistake #1: Jabbing or Drilling
What it looks like:
– Holding the cue vertically and stabbing it down into the chalk repeatedly
– Grinding the chalk into the tip like drilling a hole
Why it’s wrong:
– Damages tip shape, creating a flat spot or indentation
– Distributes chalk unevenly
– Can compress the tip unevenly
– Creates a divot in the chalk cube
The fix: Use gentle twisting or painting motions instead.
Mistake #2: Chalking Too Fast
What it looks like:
– Quick 1-2 second swipe across the tip
– Minimal contact time
Why it’s wrong:
– Incomplete coverage, especially on the edges
– Doesn’t build enough chalk layer for friction
– Increases miscue risk
The fix: Take a full 3-5 seconds per chalking.
Mistake #3: Not Chalking the Edges
What it looks like:
– Chalking only the center of the tip
– Edges remain bare leather
Why it’s wrong:
– English and spin shots contact the tip edges
– Bare edges = miscue on spin shots
The fix: Ensure edge-to-edge coverage, especially if you use English frequently.
Mistake #4: Chalking Over the Ferrule
What it looks like:
– Chalk making contact with the ferrule (white/black plastic/linen piece below the tip)
– Blue/green chalk marks on the ferrule
Why it’s wrong:
– Chalk on ferrule serves no purpose
– Creates messy buildup
– Can get chalk dust on your hands and the table
The fix: Hold the chalk carefully to contact only the leather tip.
Mistake #5: Using Damaged or Wrong Chalk
What it looks like:
– Using rock-hard, dried-out chalk
– Using chalk with divots and damage
– Using the wrong type of chalk (talc/dry instead of pool chalk)
Why it’s wrong:
– Damaged chalk doesn’t transfer properly to the tip
– Wrong chalk types don’t provide adequate friction
The fix: Keep fresh, quality chalk in your cue case and replace when worn.
Mistake #6: Forgetting to Chalk
What it looks like:
– Shooting 3-5 shots between chalking
– Remembering only after a miscue
Why it’s wrong:
– Inconsistent friction shot-to-shot
– Eventually leads to miscues
– Reduces spin capability
The fix: Make chalking a pre-shot routine, just like your practice strokes.
Different Types of Chalk
Standard Chalk (Blue/Green)
- Most common (Master, Blue Diamond, etc.)
- Works well for all purposes
- Affordable
- Leaves visible residue
Premium Chalk
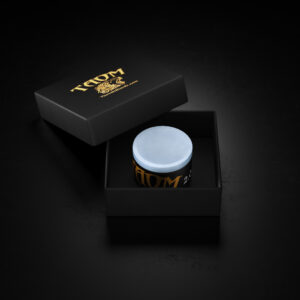
- Kamui, Taom, Predator, etc.
- Finer grain, better friction
- Less residue/mess
- More expensive ($15-25 vs $1-3)
- Lasts longer per cube
Specialty Colors
- Red, black, brown, etc.
- Functions identically to blue/green
- Aesthetic choice or to match cloth color
Does expensive chalk matter?
For beginners: Not significantly. Standard chalk works fine.
For advanced players: Premium chalk provides slightly better friction, less mess, and longer-lasting coverage. Many professionals swear by it.
Building a Chalking Routine
Develop a consistent pre-shot routine that includes chalking:
- Survey the shot (determine aim point and position)
- Chalk your tip (3-5 seconds, complete coverage)
- Approach the table and get into your stance
- Execute practice strokes
- Shoot
This routine ensures you never forget to chalk and builds muscle memory that carries into pressure situations.
-
Sale!
-
-
-
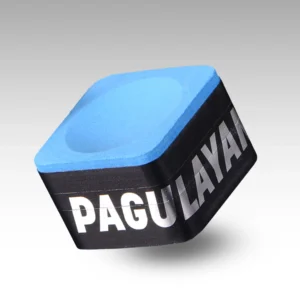
Pagulayan Chalk – Single
$25.00 Select options This product has multiple variants. The options may be chosen on the product page -
Sale!
-
Chalk Etiquette
Tournament/Serious Play
- Chalk away from the table to avoid getting chalk dust on the playing surface
- Turn away or shield the table when chalking
- Use chalk holders or your pocket, not the rail
- Don’t leave chalk on the table edge (house rule dependent)
Recreational Play
- Follow house rules about chalk placement
- Don’t steal chalk from other tables
- Replace chalk in designated areas when finished
- Bring your own chalk to avoid issues
Maintaining Your Chalk
Keep your chalk in good condition:
- Store in a chalk holder or case to prevent drying and damage
- Avoid dropping (creates divots and cracks)
- Replace when damaged or dried out
- Keep clean—wipe off debris that accumulates
Quality chalk and accessories are inexpensive investments that significantly impact your game.
What About Liquid Chalk?
Liquid chalk (like Taom Pyro) offers:
– Longer-lasting coverage (claims of 5-10 shots per application)
– Less mess
– Premium price
Pros:
– Convenient
– Cleaner
– May last multiple shots
Cons:
– Expensive
– Initial application technique differs
– Not universally accepted in tournaments
Traditional cube chalk remains the standard and is recommended for most players.
The Bottom Line
Proper chalking is a simple skill with a massive impact on your game:
Key Principles:
– Chalk before every shot (or at minimum, every spin/power shot)
– Use a twisting or painting motion for 3-5 seconds
– Ensure complete coverage including edges
– Never jab or drill—gentle application only
Miscues are embarrassing and costly. Spending 3 seconds per shot on proper chalking prevents them completely.
Make chalking part of your pre-shot routine, invest in quality chalk, and you’ll see immediate improvement in consistency and confidence. Your tip stays protected, your shots stay true, and you’ll never experience that sinking feeling of a miscue on a game-winning shot.
-
-
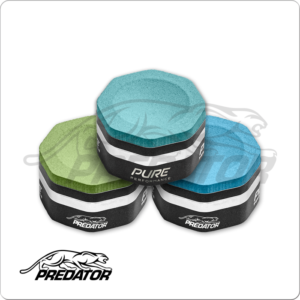
Predator CHPURE Pure Chalk – Single
$19.94 Select options This product has multiple variants. The options may be chosen on the product page -
-
Predator Grey BGLPG Second Skin Glove – Bridge Hand Left
$29.00 Select options This product has multiple variants. The options may be chosen on the product page -
-
Check your chalking technique tonight—those three seconds could be the difference between winning and watching your opponent run out.