 844 408 3056

 Hot Deal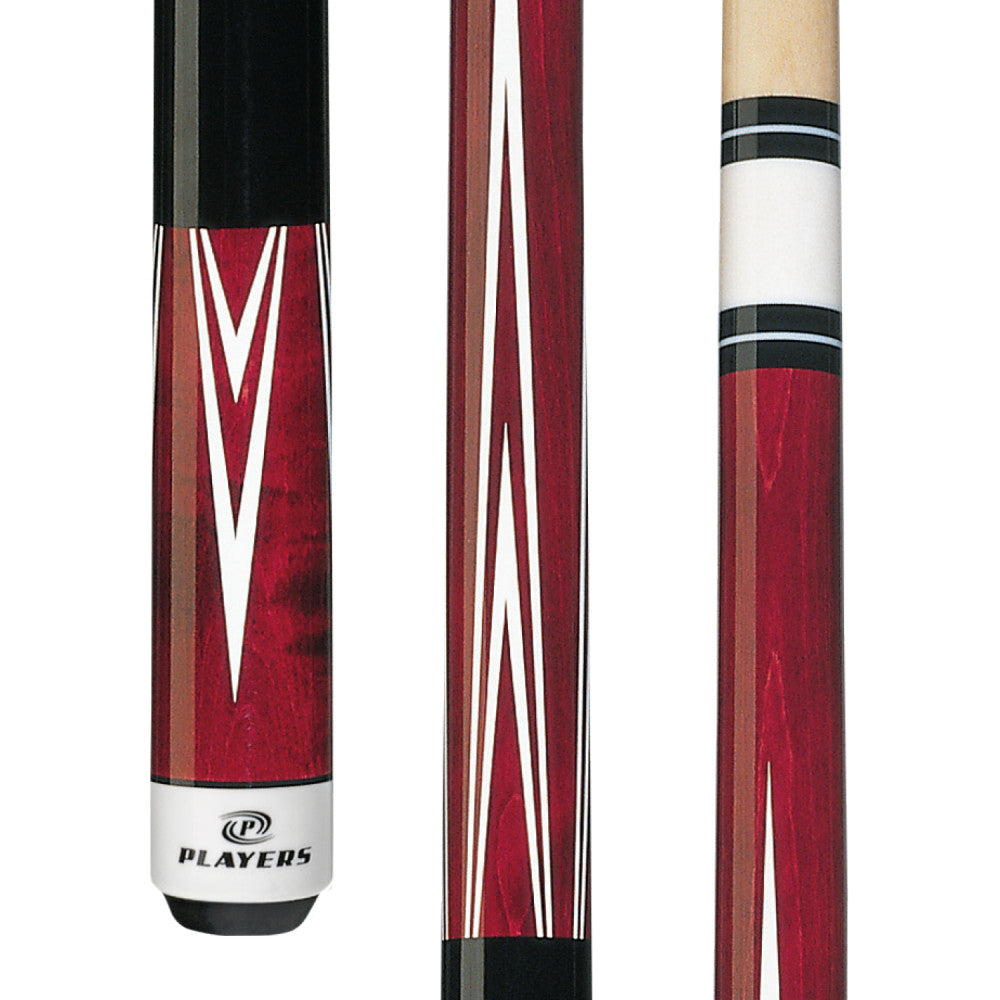
Most missed shots are decided before the cue ever moves. The stroke gets blamed, the tip gets blamed, the table gets blamed, but if you film yourself for a night at the pool hall, you will find that the shots you miss are the ones where your feet, hips, and eyes were pointed somewhere other than the shot line. Fix the setup and the stroke has a chance. Leave the setup random and no amount of practice will make you consistent, because you are practicing a different shot every time.
This guide covers the three things that make a repeatable setup: where you stand, how you get down, and the pre-shot routine that ties them together so the process runs the same way when the match is on the line as it does on a Tuesday afternoon.
Start behind the shot, not beside it
The shot line runs from the center of the cue ball through the contact point on the object ball. Before anything else, stand upright directly behind that line, a step or two back from the table, and look at it. This is where you decide what the shot is: the pocket, the speed, any spin, and where the cue ball needs to finish. Every decision gets made here while you are standing tall, because the moment you bend over you lose perspective and your brain will start negotiating.
Amateurs skip this step constantly. They walk up to the table from the side, drop into a stance, and then start aiming from down there, with the body already committed to a line that was never chosen on purpose. If you take nothing else from this article, take the habit of stopping behind every shot for two seconds before you move.
Feet and hips: build the stance from the ground up
There is no single correct stance, but there are rules that every good stance obeys. Your back foot goes on the shot line, or very close to it, with the toe pointed roughly forty-five degrees away. Your front foot steps forward and to the side, about shoulder width, so your hips can turn slightly and clear a path for the cue to swing past your body. Weight is split fairly evenly, maybe a touch more on the back foot for a right-handed player.
The test is simple: get down on a shot, then have someone gently push your shoulder. If you wobble, the base is too narrow or your weight is on your toes. Widen the stance a few inches, sink slightly into your knees, and try again. A stable base is what lets your arm swing freely instead of your whole body lunging at the ball.
Height matters too. Taller players often do better with a wider stance and a bent front knee, while shorter players usually stand more upright and closer to the table. Either way, the goal is the same: the cue swings in a straight line past your hip and under your chin, and the rest of you stays still.
Your eyes: find your vision center
Here is the piece most players have never checked. Everyone has a point between their eyes, and it is rarely the exact middle, where the cue looks straight when it is actually straight. For some players the cue belongs under the dominant eye. For others it sits closer to the nose. If your cue is under the wrong spot, a shot that looks dead straight to you is aimed a quarter ball off, and you will spend years compensating with your stroke without knowing why.
To find yours, set up a straight-in shot down the length of the table, get down, and have a friend stand at the far end and tell you whether the cue is actually on the line. Move your head a little left, then a little right, until what looks straight is straight. Note where the cue sits relative to your face. That is your vision center, and every stance you build from now on should put the cue there. Our guide to aiming systems explains why this matters even more once sidespin and deflection enter the picture.
Grip and bridge: the parts that connect you to the cue
The grip should be light. Think of holding a bird: firm enough that it cannot leave, loose enough that you are not crushing it. Your fingers cradle the cue and the wrist stays relaxed so the cue can swing like a pendulum. A tight grip is the number one cause of the cue lifting off the line during the final stroke.
Bridge length is a personal choice within a range. Most players do best with the bridge hand eight to ten inches from the cue ball on normal shots, shorter for delicate shots and slightly longer for power. What matters is that you use the same bridge length for the same kind of shot every time, so the cue tip travels through the same arc and the timing feels identical.
The pre-shot routine: the part that survives pressure
A routine is a fixed sequence of physical actions that you perform identically before every shot, so that your body knows what to do when your mind is busy being nervous. It should take four to eight seconds. Here is a version that works for a lot of players, and you can adjust the order once you have run it a few hundred times.
Step one: decide standing up
Behind the shot line, pick the pocket, the speed, and the cue ball path. Say the plan to yourself in one short phrase. Something like “slow, half tip of left, land near the side pocket.” If you cannot describe the shot in a sentence, you have not finished deciding.
Step two: step in on the line
Place the back foot on the shot line first, then the front foot. Bring the cue down onto the line as you drop into the stance, so that the cue is already pointing where you want it before your bridge hand touches the cloth. Getting down and then swinging the cue into position is how misalignment sneaks in.
Step three: settle and check
Once you are down, take two or three easy practice strokes while your eyes move between the cue ball and the object ball. This is where you confirm the tip is on the exact spot of the cue ball you planned. If anything feels off, stand up and start again. Standing up costs you five seconds. Shooting a shot you do not trust costs you the rack.
Step four: pause, then deliver
Bring the tip back to the cue ball, pause for a beat, let your eyes settle on the object ball contact point, and then deliver the stroke with a smooth acceleration. Stay down until the object ball reaches the pocket. Popping up early is the most common fault at every level, and staying down is the easiest fix, because it forces the rest of the routine to be complete.
How to practice a routine
Do not practice it during a match. Practice it on straight-in shots at slow speed, where the only variable is whether you followed the sequence. Shoot twenty shots and give yourself a point for every one where you did all four steps, regardless of whether the ball went in. After a week, the pocketing rate takes care of itself. Then move on to the stun shot drills and the draw shot fundamentals, both of which depend on hitting the cue ball exactly where you planned.
The cue makes a difference, but not the way people think
Fancy equipment will not build a stance for you. What a good cue does is remove variables. A shaft that is dead straight, a tip that is the same shape every time, and a weight you have grown used to all mean that when something goes wrong, the fault is in your setup and you can fix it. A cheap house cue with a warp and a mushroomed tip means you never know whether it was you.
That is why Players cues are our standard recommendation for anyone serious about building fundamentals on a budget. They are made from North American grade A hard rock maple, they carry a lifetime warranty that covers warpage, and the 13mm shaft with a 5/16×18 joint is a classic, forgiving setup that plays the same way every day.
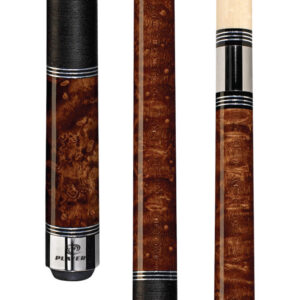
The Players 4 Point Crimson Wrapless Cue is the one we hand to most beginners: a crimson-stained birdseye maple forearm with four white veneer points, no wrap, and a price of $175. Wrapless cues teach you to hold the cue lightly, because a bare maple handle gives you immediate feedback when you squeeze. If you prefer the traditional feel of a wrap, the Players Nutmeg Birdseye Cue with Black Linen Wrap at $199 pairs a double-pressed Irish linen wrap with a stainless steel joint collar and classic nutmeg staining.
For a little more color, the Players Blue Maple Cue with Black Linen Wrap at $208 uses a blue-stained birdseye forearm with a cross graphic overlay. And for players whose hands sweat under pressure, the Players Jester Sport Grip Cue at $285 uses a rubberized multi-zone grip with three traction zones that keeps the back hand from slipping on the final stroke.
Featured Players Products
-
-
-
-
-
-
-
-
Putting it together
Nearly every fault traces back to a step in the routine that got skipped. When you catch yourself missing, do not adjust your aim. Go back to the routine and find the step you left out.
Stance, alignment, and routine are boring to practice and they are what separates players who plateau from players who keep improving. Spend a month on nothing but straight shots with a full routine and you will pocket more balls than a year of random practice can deliver. When you are ready to pick a cue that will stay consistent through that month and long after, start with the Players lineup, browse the broader starter cues collection, or compare everything in our full pool cue range.

About Corey Bernstein
Corey Bernstein is a competitive pool player, billiards equipment specialist, and co-owner of Quarter King Billiards in Wilmington, North Carolina. With over a decade of experience in the sport, Corey has competed in regional APA and BCA sanctioned tournaments and maintains an intimate knowledge of cue construction, shaft technology, and table mechanics. As a certified dealer for brands including Predator, McDermott, Jacoby, Viking, Lucasi, Meucci, Joss, and Cuetec, Corey personally tests and evaluates every cue that comes through the shop. His hands-on approach to the business means he has racked thousands of hours behind the table — breaking in shafts, comparing tip compounds, and dialing in the nuances that separate a good cue from a great one. When he is not behind the counter or on the table, Corey is researching the latest advances in low-deflection technology, carbon fiber shaft construction, and cue ball physics. His articles on Quarter King Billiards combine real-world playing experience with deep product knowledge to help players at every level find the right equipment for their game.